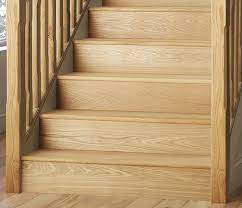
When it comes to home improvement projects, updating your staircase can make a significant impact on the overall aesthetics of your space. Laminate flooring offers an excellent option for stairs, providing durability, affordability, and a wide range of design choices. However, tackling this project can be daunting, especially if you’re new to DIY projects. But worry not! In this article, we will guide you through the process of how to do laminate flooring on stairs, offering valuable insights, expert tips, and answers to common questions. By the end, you’ll have the confidence to transform your stairs into a beautiful focal point that complements your home’s interior.
Getting Started: Tools and Materials You’ll Need
Before we delve into the step-by-step guide, let’s gather the essential tools and materials for this project. Here’s a comprehensive list:
Tools:
- Circular Saw
- Jigsaw
- Measuring Tape
- Carpenter’s Square
- Pry Bar
- Chalk Line
- Pencil
- Rubber Mallet
- Utility Knife
- Hammer
- Nail Set
- Safety Gear (Goggles, Dust Mask, Knee Pads)
Materials:
- Laminate Flooring Planks
- Underlayment
- Nails or Screws
- Construction Adhesive
- Stair Nosing
- Transition Strips (if necessary)
Assessing Your Stairs and Preparing the Surface
The first step in this project is to evaluate your existing stairs and ensure they are suitable for laminate installation. Inspect the condition of the stairs, looking for any damages or squeaks. Address any structural issues before proceeding. Once your stairs are ready, follow these preparation steps:
- Remove Old Flooring: If your stairs have carpet or any other existing flooring, remove it carefully using a pry bar and utility knife. Ensure the surface is clean and free from any debris.
- Measure Each Step: Accurate measurements are crucial for a seamless installation. Measure the width and length of each step, including the riser (vertical part) and the tread (horizontal part).
- Cut Underlayment: Cut the underlayment to the measurements you took. Underlayment provides stability, sound insulation, and helps smooth out imperfections in the stair surface.
- Attach Underlayment: Use construction adhesive to secure the underlayment to each step. Make sure there are no air bubbles or wrinkles.
Installing Laminate Flooring on Stairs
With the preparation complete, it’s time to move on to the main installation process. Follow these steps carefully to achieve professional-looking results:
- Start from the Bottom: Begin the installation from the bottom of the stairs and work your way up. This ensures you don’t trap yourself while moving upward.
- Cut Laminate Planks: Measure and cut the laminate planks to fit the dimensions of each tread and riser. Use a circular saw or jigsaw for precise cuts.
- Dry Fit the Planks: Before gluing the planks, do a dry fit to ensure they fit perfectly. Make any necessary adjustments as required.
- Apply Adhesive: Apply a generous amount of construction adhesive to the back of each plank. Carefully press them onto the tread and riser, making sure they bond well with the underlayment.
- Use Nails or Screws (Optional): For added stability, you can use nails or screws to secure the laminate planks further. Ensure they are countersunk to avoid any protrusions.
- Continue the Installation: Repeat the process for each step until you reach the top of the staircase. Take your time to maintain a consistent and uniform appearance.
- Install Stair Nosing: Stair nosing provides a professional finish to the edges of each step, preventing wear and tear. Cut the nosing to size and attach it with adhesive and screws.
- Install Transition Strips (If Needed): If your stairs meet another flooring type at the top, consider using transition strips for a seamless connection.
FAQs about Laminate Flooring on Stairs
Q: Can I install laminate flooring on spiral staircases?
A: While it’s possible, installing laminate on spiral stairs can be challenging due to their unique shape. It’s best to consult a professional for such installations.
Q: How long does it take to complete the installation?
A: The duration depends on the number of stairs and your experience level. On average, it can take a few days to complete the entire project.
Q: Can I install laminate flooring on stairs with a curved design?
A: Yes, you can install laminate on stairs with a curved design, but it requires special cutting techniques. Consider seeking expert help for this intricate task.
Q: Is laminate flooring on stairs slippery?
A: Laminate flooring can be slippery, especially if it’s wet. To enhance safety, choose laminate with a textured surface or add slip-resistant adhesive strips.
Q: Can I install laminate over existing hardwood stairs?
A: Yes, you can install laminate over existing hardwood stairs. Ensure the hardwood surface is clean, level, and in good condition before installation.
Q: Should I hire a professional for this project?
A: While DIY installation is possible, hiring a professional ensures precise and flawless results, especially for complex staircase designs.
Conclusion
Transforming your stairs with laminate flooring can elevate the aesthetic appeal of your home while adding durability and value. By following our comprehensive step-by-step guide, you now have the knowledge and confidence to embark on this exciting DIY project. Remember to gather the necessary tools and materials, prepare the surface carefully, and execute the installation with patience and precision. Whether you have a straight staircase or a more complex design, laminate flooring can breathe new life into your stairs and make them a true centerpiece in your home.

